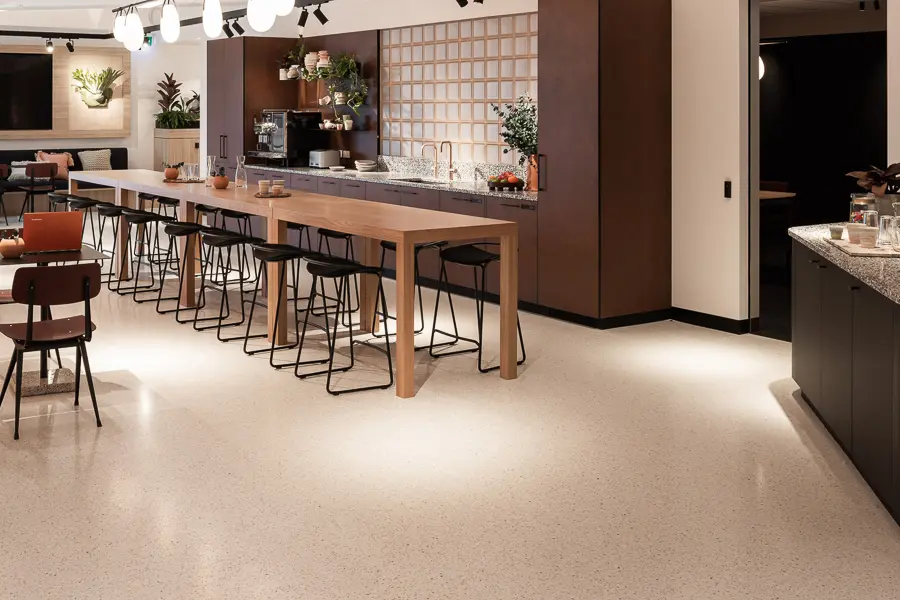
Modern terrazzo flooring successfully blends timeless elegance and durability — but only if it’s installed with care. If you’re a manager or developer overseeing the installation of terrazzo flooring at your Perth property, here’s a useful overview of the process to help you manage your project better.
Hiring An Experienced Terrazzo Specialist
Terrazzo is a luxury floor finish that requires installers with knowledge, experience, and precision. They must be capable of avoiding the following four (4) mistakes:

- Poor substrate preparation often leads to early failures (delamination, cracking, moisture issues).
- Incorrect mix ratios or rushing pours compromise strength, appearance, or durability (especially with epoxy).
- Poor grinding/polishing ruins the visual integrity; exposed aggregates may be uneven, colour patches may show, and the surface may remain dull.
- Improper sealing can make the floor look worn quickly, stain easily, or degrade under traffic or spills.
Thus, your first step should be to hire a reputable terrazzo flooring contractor for your project.
The Terrazzo Flooring Installation Process: From Planning to Finish
There are different types of terrazzo flooring systems. However, they follow the same general installation process.
Stage 1. Planning, Design & System Selection
Meet with your flooring contractor, engineer, architect, and interior designer. Have a discussion with them to help define:
- The appropriate type of terrazzo system – This is dependent on the project brief and site conditions. Are you dealing with a new build or a space renovation that limits the floor types you can use? Is your space an indoor or outdoor location? Consider traffic load, substrate condition, and aesthetic preferences as well.
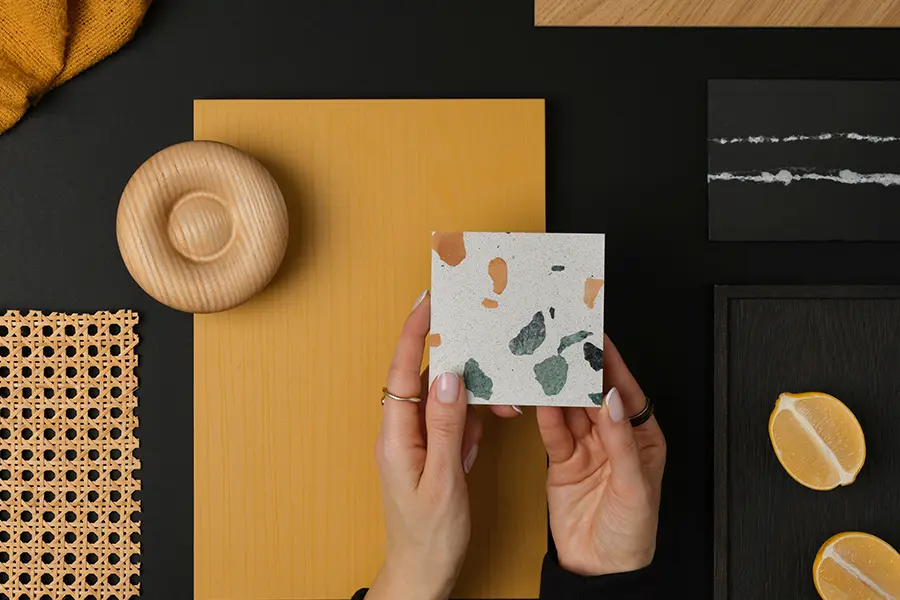
- Aggregate selection and look – Choose your materials (marble, quartz, glass or stone chips). Decide on the colours for the aggregates and binder. Pick which patterns, borders, inlays or motifs to use.
- Layout and control-joint/divider‑strip plan – This is especially important for designs with multiple colours, zones, or for managing slab movement/expansion (in challenging terrain or conditions).
Examples:
- If you require thin, quick‑curing flooring for your commercial lobby, a flooring contractor may advise you to choose a resin-based (epoxy) terrazzo.
- For a renovation of old slab surfaces where demolition is impractical, a traditional cementitious/overlay system is the most practical solution.
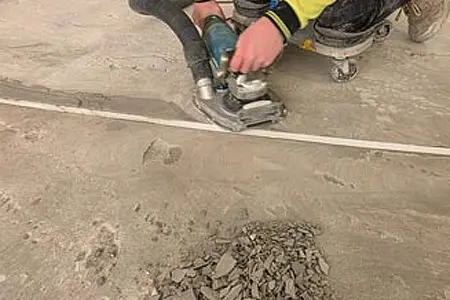
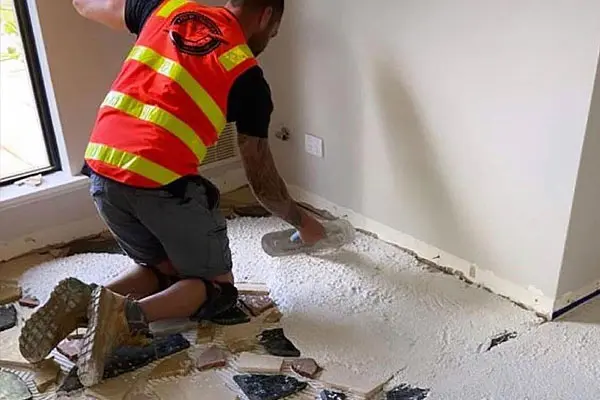
Stage 2. Subfloor / Concrete Preparation
This is the most critical stage. All terrazzo floors require proper subfloor preparation. Without a well-prepared surface, the terrazzo topping may fail to bond properly and later suffer delamination, cracking, or uneven wear.
This stage is primarily the responsibility of your floor contractor. Their key tasks should include:
- Removing existing floor coverings, adhesives, coatings, paints, sealers – This ensures the substrate is bare and clean.
- Mechanically profiling the concrete surface – This is done via diamond grinding, shot‑blasting or scarifying. The process opens up the concrete surface for proper bonding. (This is especially important for epoxy terrazzo.)
- Checking old or new concrete slab for moisture and vapour emission – Terrazzo floors (especially epoxy types) are sensitive to moisture coming up from the slab. The subfloor concrete must be tested. For example, with in‑situ humidity probes under standards like ASTM F‑2170 and vapour barriers or mitigation systems applied, if needed.
- Repairing defects and levelling the slab – This involves filling in cracks, patching blow-holes, and smoothing out unevenness. For renovation work, you and your contractor may consider screed or self-levelling compounds to meet flatness tolerances.
- Thorough cleaning – The contractor must also vacuum and remove dust, grease, curing agents, waxes or any other contaminants that might interfere with the adhesion of the terrazzo layer.
Stage 3. Divider Strips & Layout Setup
Once the subfloor is ready, the floor contractor’s installers will lay out divider (or control‑joint) strips. These are usually thin metal strips (brass, zinc, or aluminium) fixed to the slab.
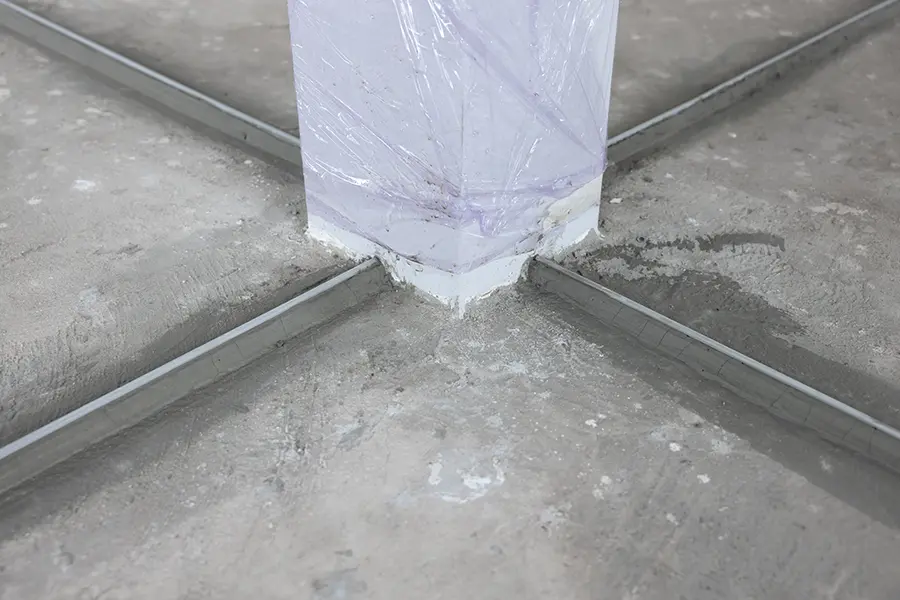
- These strips divide the floor into design panels or zones (especially when using multiple terrazzo colours or aggregate mixes).
- They also function as control and expansion joints, managing slab movement and reducing the risk of random cracking in the terrazzo topping.
- Where intricate patterns, borders, or inlays (e.g. logos, lines, two-tone zones) are specified, divider strips define these layout boundaries precisely.
In effect, this stage transforms the floor from a blank canvas to a detailed map. The divider strips ensure that when the terrazzo formula mix is poured, it flows only where it’s supposed to and finishes cleanly.
Stage 4. Mixing, Pouring & Curing the Terrazzo
Once the layout is ready, the floor contractor prepares the terrazzo formula or “mix” and applies it on top of the substrate.
The terrazzo is poured or placed within the divider‑strip frames (or across the prepared slab for monolithic overlay systems). Installers will hand- or power‑trowel the mix to spread it more evenly, embed aggregates, and level the surface.
How the terrazzo mix is prepared and applied will vary, depending on the chosen type of terrazzo. For example:
- Epoxy / resinous terrazzo: Two-part epoxy resin (Part A) + hardener (Part B) are mixed together with decorative aggregates. Typical mixing ratios vary by product (some ~ 5:1 resin to hardener), with filler powders or marble dust often added for workability.
- Cementitious terrazzo: Portland-cement (or polymer-modified cement) is mixed with water, aggregates (marble, stone, glass) and any pigments, in a ratio specified by the design or product specs.
- For multi-colour designs, installers may pour different mixes sequentially, carefully following the layout.
After pouring, the terrazzo topping must be left to cure. How long it takes to cure also depends on the terrazzo type. For instance, epoxy typically cures within 18–24 hours. For cementitious terrazzo, it may sometimes take several days to weeks (depending on thickness and ambient conditions).
Stage 5. Grinding & Polishing
Once the terrazzo has cured, the rough surface must be refined.
The floor contractor will first use industrial diamond grinders (coarse grit first) to grind down the surface, expose the embedded aggregates, and level the floor. Then they apply progressively finer grits to smooth the surface. (Note: Exposed divider strips will define the design layout or colour panels.)
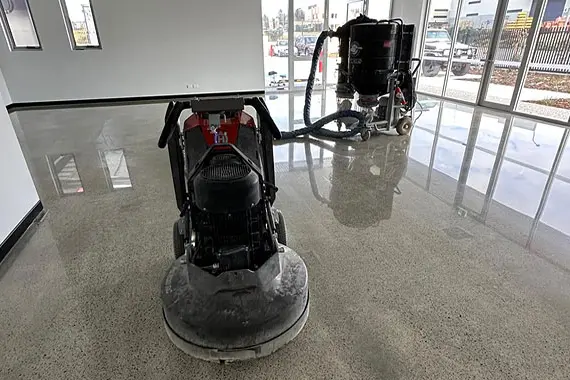
- After initial grinding, they inspect the floor for any pinholes, voids, or surface imperfections. These are filled or “grouted” with matching epoxy or grout mix, smoothing out flaws.
- Once the surface is refined and flaws are fixed, the contractor goes into wet polishing. This smoothens the surface even further, according to the design specification — anywhere from medium to fine grit, up to a high sheen. Edge grinders are used for corners and spots that a larger floor grinder can’t reach.
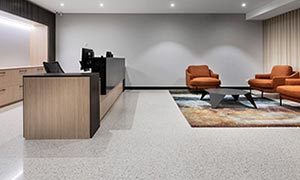
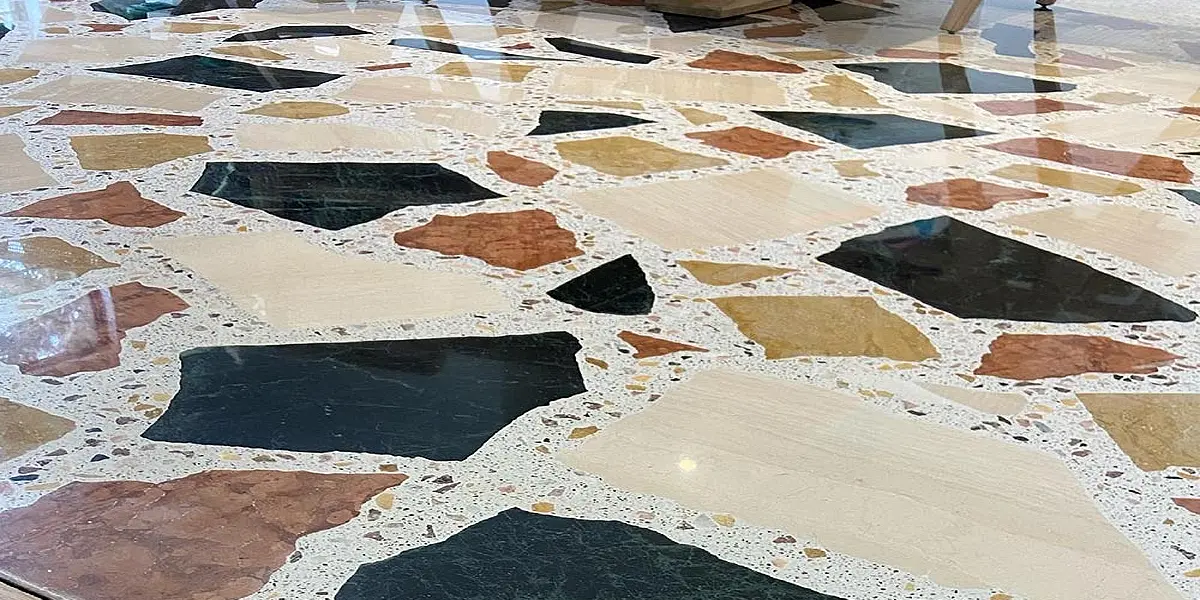
The result is a seamless terrazzo surface that reveals the beauty and pattern of the aggregates (with divider strips elegantly framing any intricate designs).
Stage 6. Sealing and Protection
After polishing, the final step is sealing. This ensures the floor not only looks good but remains durable, stain-resistant, and easy to maintain.
A compatible sealer (often epoxy, acrylic, or urethane-based) is applied to protect the floor from water, chemicals, oil, grease, acids, solvents, and wear. This is typically done in two coatings.
After the sealer cures, the floor is ready for use.
Modern Variations & Innovations
While traditional-style terrazzo remains popular, renovations and retrofits now often use newer overlay or veneer-style terrazzo systems (e.g. micro‑toppings, polymer‑enhanced cement overlays, thin-set epoxy/terrazzo overlays).
These newer systems offer:
- Minimal demolition – a terrazzo finish can be applied over an existing slab, tile, timber or concrete floor, provided the substrate is prepared correctly.
- Reduced thickness and lighter load – useful in renovations or where slab load capacity is limited.
- Customisable finishes – these combine “terrazzo-style” aesthetic with modern binder technology and lower environmental impact (e.g., using polymer binders, recycled aggregates, low-VOC sealers).
Those modern innovations have expanded the range of terrazzo floors for you to choose from.
The Main Types of Terrazzo Flooring Systems
There are four (4) distinct terrazzo types: epoxy, cementitious (traditional), micro-topping or overlay, and sand-cushioned. To fully appreciate the terrazzo installation process, you must understand the basic structure of each terrazzo type.
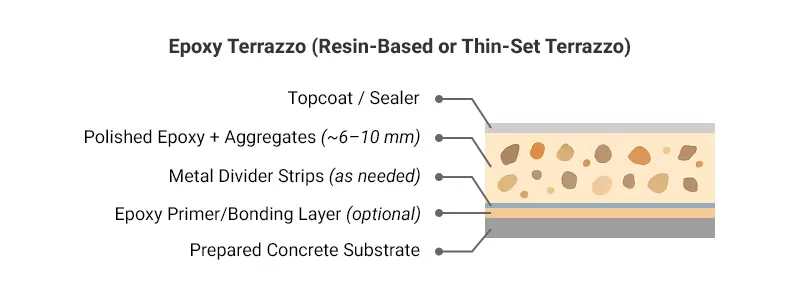
1. Epoxy Terrazzo (Resin-Based or Thin-Set Terrazzo)
Epoxy terrazzo is a thin-set, resin-based flooring system where epoxy resin acts as the binder for decorative aggregates such as marble, glass, or quartz chips. It is typically poured in thin layers (~6–10 mm or ¼–3/8 inch) over a prepared substrate. It usually cures within 18-24 hours.
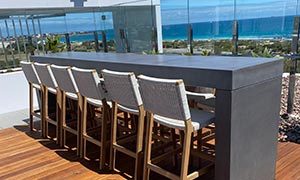
Typical Uses: Commercial lobbies, hospitals, airports, corporate offices, modern residential interiors.
Pros:
- Thin and lightweight; suitable for renovation or retrofit projects
- Wide range of colour and design flexibility (epoxy can be pigmented)
- Very durable, stain-resistant, and chemically resistant
- Quick installation and fast curing compared to cementitious systems
Cons:
- Sensitive to moisture from the substrate; requires well-prepared slabs
- Not UV-stable; can yellow or fade in direct sunlight
- More prone to scratching than cementitious terrazzo in heavy industrial traffic if not sealed properly
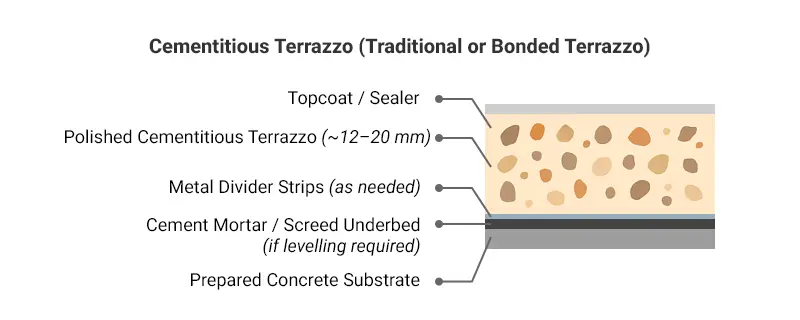
2. Cementitious Terrazzo (Traditional or Bonded Terrazzo)
Cementitious terrazzo is the classic terrazzo system where Portland cement or modified cement acts as the binder for aggregates. It is typically thicker than epoxy terrazzo (~12–20 mm or ½–¾ inch) and poured over a screed or prepared substrate. Curing requires several days.
Typical Uses: Public buildings, museums, small schools, and traditional high-end residential flooring.
Pros:
- Long-lasting and extremely durable
- UV-stable; suitable for indoor and some covered outdoor applications
- Can achieve the traditional, classic terrazzo look
- Easier to repair minor surface damage
Cons:
- Longer curing times slow down completion
- Heavier system may require stronger subfloor/structural support
- Less flexible than epoxy for thin overlay projects
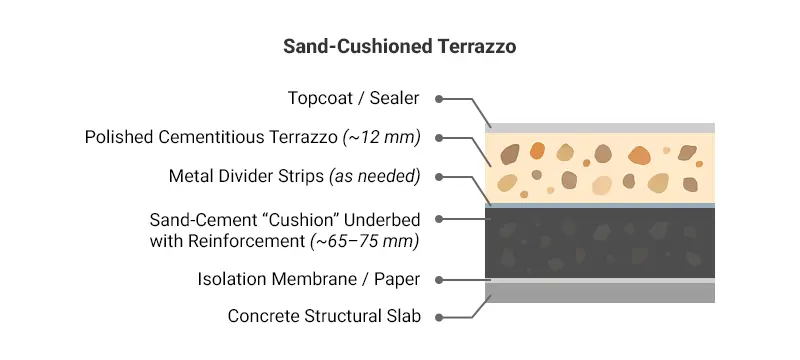
3. Sand-Cushioned Terrazzo
Sand-cushioned terrazzo is a hybrid system, an older, traditional method designed to protect the terrazzo layer from cracking due to slab movement. It involves a sand-cement underbed (the “cushion”) between the structural slab and the terrazzo topping. Curing also requires several days.
Typical Uses: Historic high-traffic public areas, old building restorations, traditional institutional flooring.
Pros:

- Protects the terrazzo layer from slab deflection, cracking, and thermal movement
- Very durable when properly installed
- Classic technique for historical preservation or high-traffic areas
Cons:
- More labour-intensive
- Thicker and heavier layer build-up
- Longer installation time and curing required
- Less common in modern installations due to epoxy and overlay alternatives
4. Overlay Terrazzo (Veneer or Micro-Topping)
Overlay terrazzo (also called micro-topping or veneer terrazzo) is a thin polymer-modified cementitious layer or epoxy-based topping applied over an existing slab or flooring. It mimics traditional terrazzo appearance without the need for full demolition.
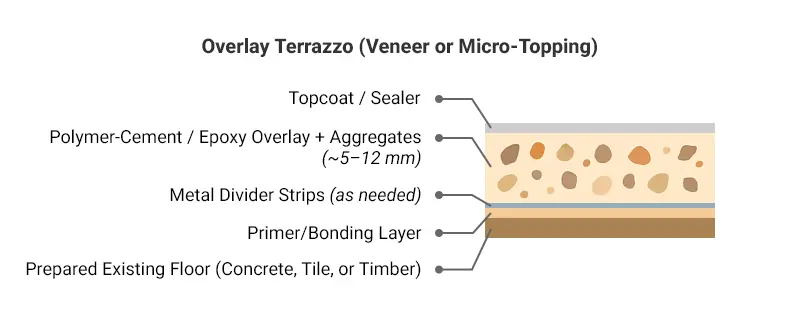
Typical Uses: Modern office renovations, residential overlays, environmentally-conscious projects (low-carbon flooring).
Pros:
- Thin and lightweight; ideal for retrofits and renovations
- Can be applied over existing concrete, tile, or timber
- Faster installation and less disruption
- Sustainable: often uses low-carbon binders and recycled aggregates
Cons:
- Thickness limitation may reduce impact resistance compared to a full cementitious system.
- The substrate must be very well prepared.
- Requires skilled installation to ensure adhesion and longevity.
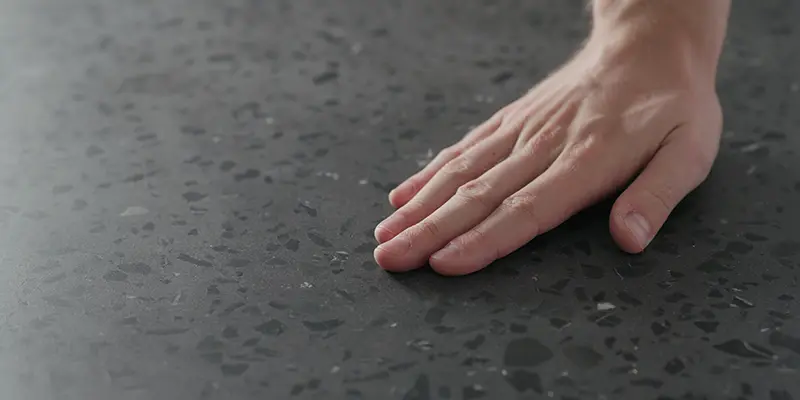
Terrazzo Flooring Maintenance & Lifespan
One of terrazzo’s greatest advantages is its low maintenance and relatively long life (i.e., decades in good condition).
However, high-traffic or commercial spaces may require periodic to frequent maintenance, resealing, and polishing schedules. These all depend on the intensity of use and surface exposure.
After-Installation Maintenance Tips:
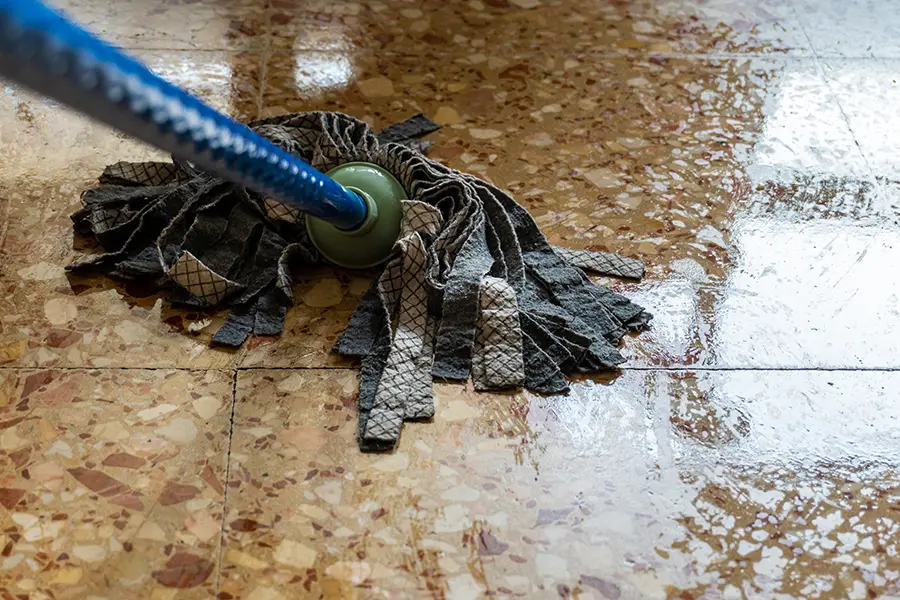
- Regular cleaning: Vacuuming is the best method, especially with accumulated grit. A dust mop or soft broom might only drag the grit and scratch the floor’s surface. For deeper cleaning, use damp mops occasionally with a pH‑neutral cleaner safe for terrazzo/stone floors.
- Avoid harsh or acidic cleaners that can degrade the sealer or damage the binder/aggregates.
- Periodic resealing or burnishing may be required for high-traffic areas or to refresh the sheen. (Consult your floor contractor for this.)
For easy reference, download our cleaning guide for our artisanal floors.
Let’s craft the enduring floor art you envision
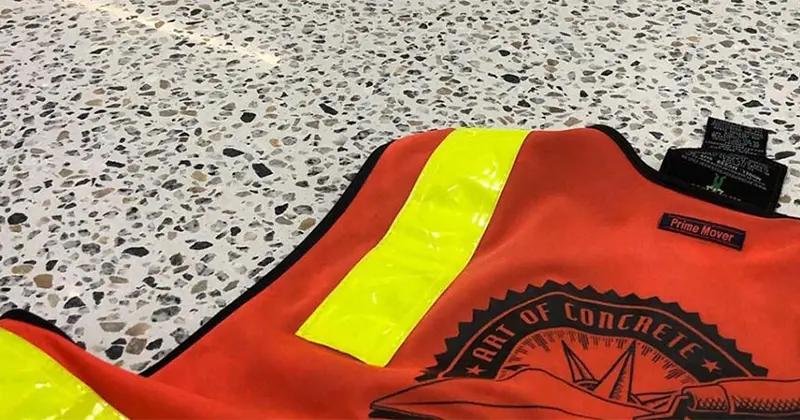
For architects, developers, and property owners seeking a premium floor finish, terrazzo remains unmatched. With a trusted partner like Art of Concrete, the terrazzo installation process from planning to final polish becomes seamless and professional.
We can render full terrazzo flooring installation or terrazzo floor restoration services in Perth. From substrate preparation and floor levelling to mixing and applying special aggregates, we do it all. Consult us today, and we’ll provide the flooring solution for your project.
Do you also have questions about sub-floor preparation for terrazzo, or want to explore other flooring options? Begin here:
- Diamond Grinding
- Floor Levelling
- How we installed modern terrazzo floors in our client’s Perth office
- Our various terrazzo flooring options
- Polished Concrete vs Other Floor Types